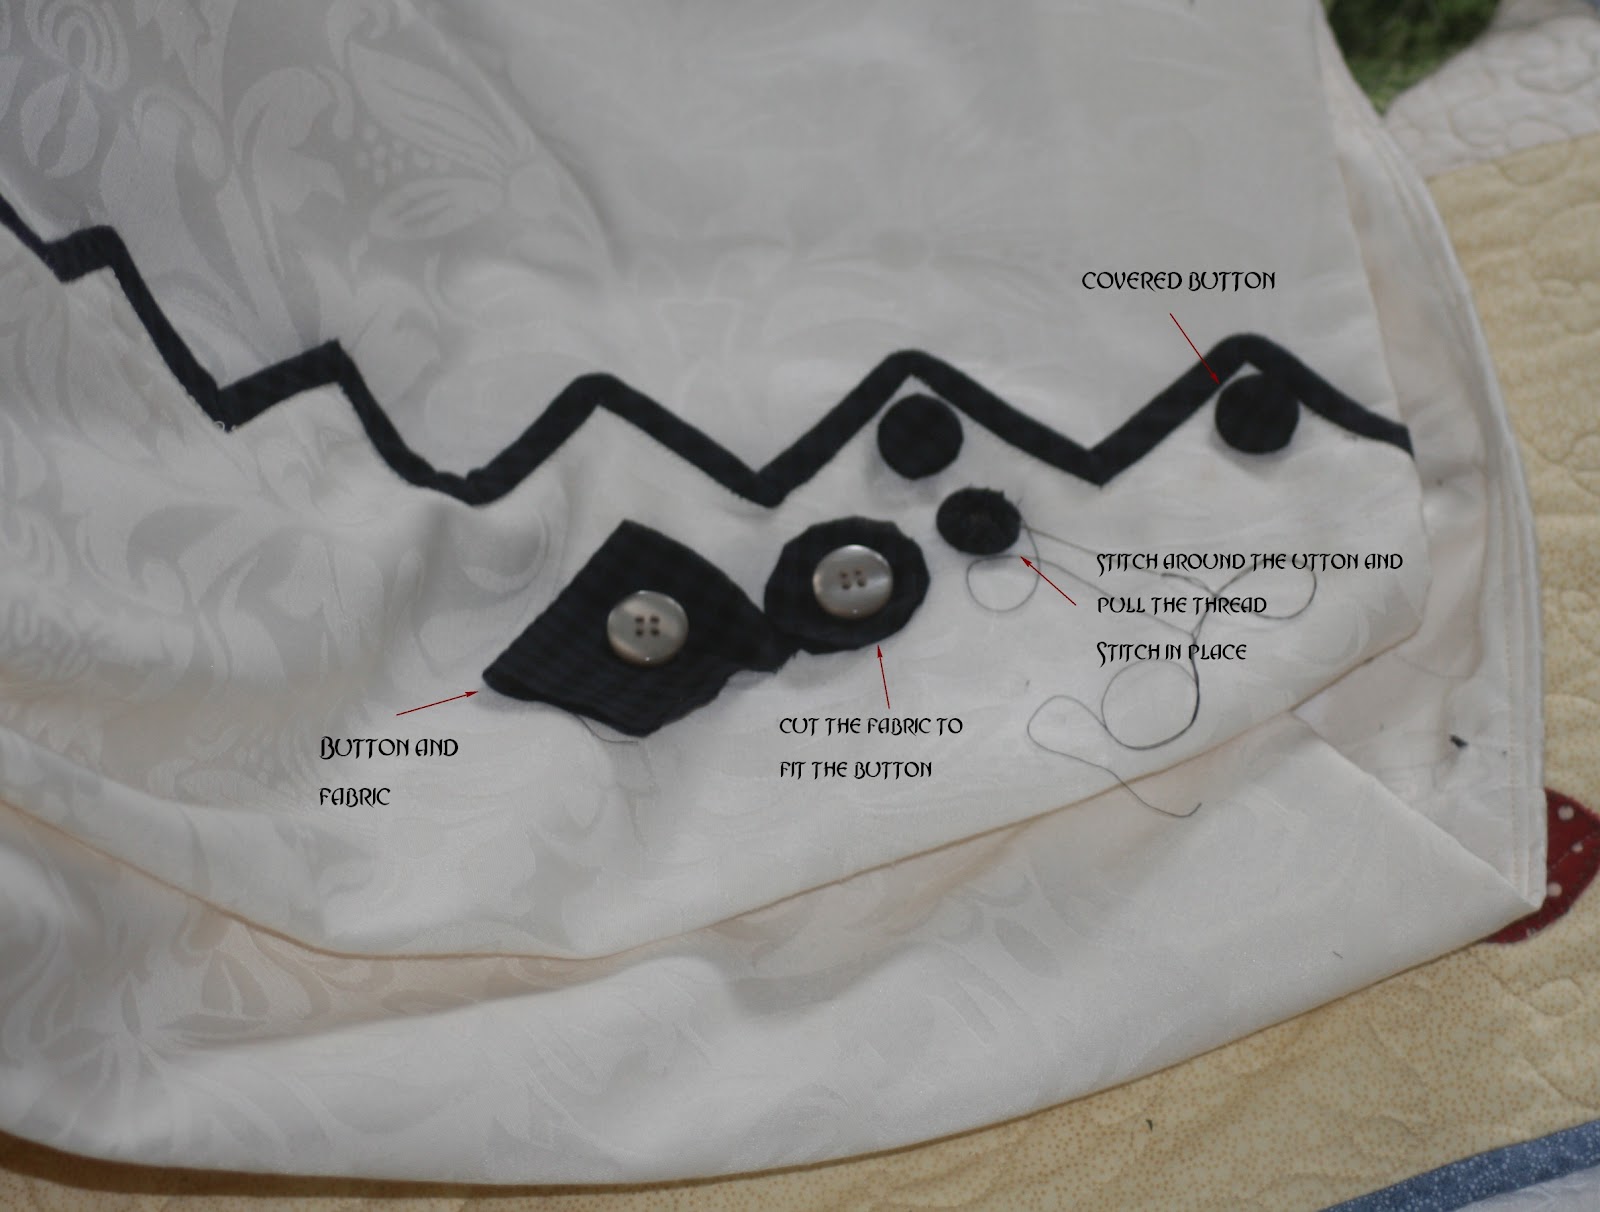
.....I say almost because I'm looking for some suitable buttons. 14 to be excact :)
The skirt is very straight forward. Just do what the instructions tells you to do. I stitched the scallops down to make them stay flat. I also split the back piece in two and added a seam there. I thought it would make it easier to adjust later on if I should need to do so.
I'm a quilter as well and well used to stitch down bias binding on scallops. I think these turned out just fine. They are without their button at this stage but I need to shop around for suitable ones. I didn't have the time to wait to finish the skirt though :)
I'm 5'9 and needed to add to the lenght of the skirt. Therefore I had to add a scallop as well I see now that I could have added two with not problem, but since I was a bit uncertain I only added one.
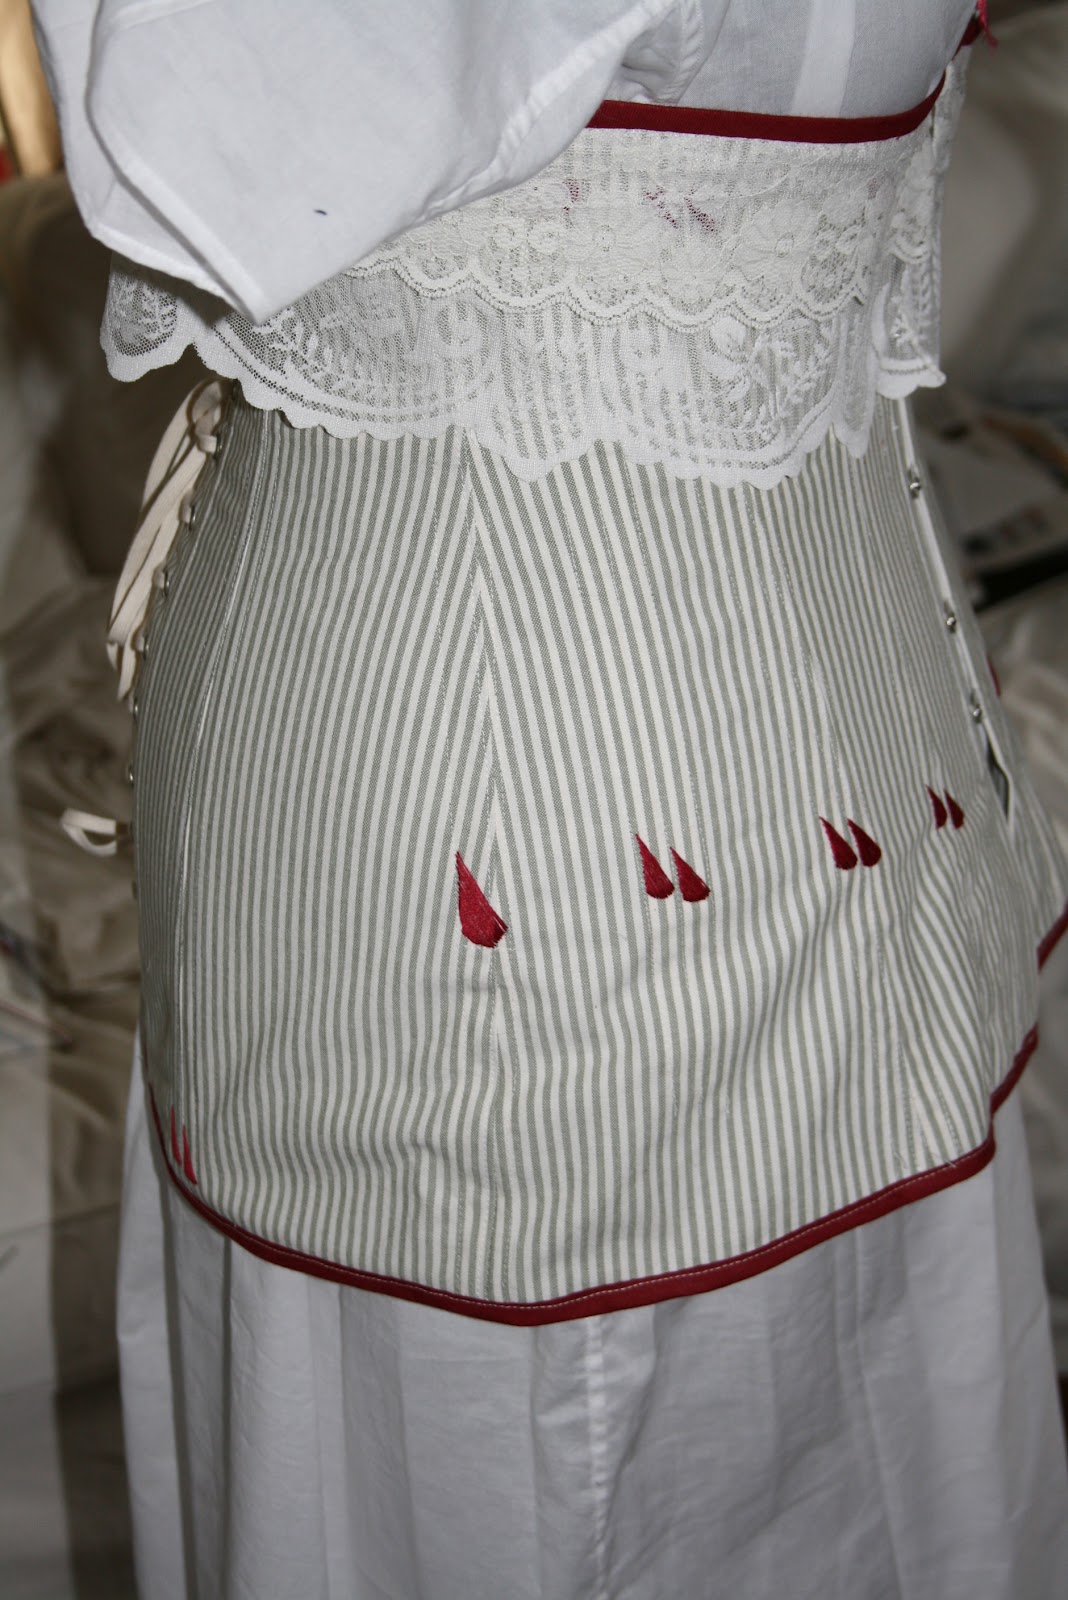
A side view. The fabric I used on the scallops is the same as I used for the blouse in this picture. The skirt itself is made out of a beautiful curtain fabric. If I didn't tell you would not have known would you? :) It is hard to get good picures when you only have a 70-300mm lense on your Canon EOS camera........
Summary:Fabric: Light creme, 100% cotton, heavy with a nice drape effect to it. Tone on tone pattern in the fabric.
Notions: 14 black/dark blue buttons (still to come), narrow
black/navy self made bias tape, snaps, hook and eye.
Techniques used:
Use these two links for a good explaiation on how to bind scallops:
Hours: Couldn't remember to count :)
Will you make this again? I actually really like this pattern! I think that without the
scallops, it'll make the perfect straight skirt for several different gowns Especially now that I've gotten it sized
to fit me.
Final thoughts: Not bad, for my first
century-old skirt pattern. I don't know when I would ever wear
this particular combination of top+skirt, but I feel like I should have a
parasol or something.
VPLL Checklist!
- Pattern Name: #E0200, Scalloped skirt
- Sewer’s Skill Level: Intermediate
- Pattern Rating: I like the scallop detail and it will look
fantastic with the trim and buttons, I give it a 4.5/5.
- What skill level would someone need to sew this pattern and
why? I think a beginner would be just fine on this pattern. There aren't
many pieces and most of the seams are straight lines. Binding the scallops was
trickier, but not impossible if you're willing to take the time to pin and iron.
Follow my links as well.
- Were the instructions easy to follow? If not, what needs to be
changed? The pattern instructions were generally easy to figure out,. I do wish that it was a little more clear on how to finish up the opening,
though. Markings for where to put snaps/hooks and eyes would be helpful, but not
necessary.
- How was the fit/sizing? Did it correspond to what you thought?
When I initially measured the pattern, it seemed that it would end up
with a final measurement of a 36" waist. If I hadn't been trying to make up the pattern as is,
I would have changed up the facing pattern to give it more structure and tapered
toward the bottom. That said, I was also wearing this without a corset because
it didn't seem entirely necessary. I think it
actually would be possible to wear this skirt uncorsetted.
- Did you make any pattern alterations? If so, what alterations did you
make? Were they fit or design alterations? I cut the back piece in two to make future alterations more easy.
- Other notes: A decent pattern, and a good starting point for
exploring vintage patterns as it was pretty simple. The scallop trim is just
enough of a design interest, but not too hard to actually sew. The overall
effect is quite nice, and I imagine it would be lovely in a drape-y wool,
although this cotton worked out surprisingly well.

.JPG)


.JPG)


